Pixel Papercraft
Contact
Sign Up
Log In
New Uploads
Browse Designs
Generators
YouTube
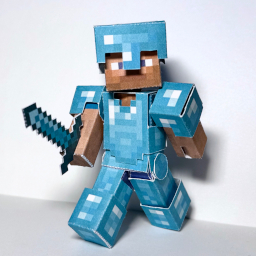
Minecraft Armor Generator
← Back to generators
Instructions
How to use the Minecraft Armor Generator?
Choosing the Armor
Select from the drop down menu under each armor part which material you want for each piece of armor.
Alternatively, you can select "Choose file" to provide your own armor texture files.
If your custom helmet texture has an overlay layer, you can click on the helmet to toggle on and off the overlay layer.
If a part of the design doesn't look right for your armor texture, you can try clicking on that part in the papercraft template to adjust that part.
Armor Options
For each armor part, there are a few options you can select from:
Tint Armor
Select from the drop down menu what color you want to tint the armor.
Select either from the drop down menu or from "Choose file" to choose the overlay that goes over the tinted part of the armor.
Trim Armor
Select either from the drop down menu or from "Choose file" to choose which trim pattern to apply to the armor.
Select either from the drop down menu or select "Choose file" to choose the material that the trim is made out of.
Enchant Armor
Select either from the drop down menu or from "Choose file" to choose the enchanted glint texture.
Adjust the sliders to choose the opacity, x and y offsets of the enchanted glint texture.
Click in the papercraft template to turn on and off the enchanted glint for each part.
Show Folds
Show Labels
Helmet
None
Leather
Chainmail
Gold
Copper
Iron
Diamond
Netherite
Turtle Shell
or
Upload Helmet texture file
Loading texture choices…
Tint Helmet
Trim Helmet
Chestplate
None
Leather
Chainmail
Gold
Copper
Iron
Diamond
Netherite
or
Upload Chestplate texture file
Loading texture choices…
Tint Chestplate
Trim Chestplate
Leggings
None
Leather
Chainmail
Gold
Copper
Iron
Diamond
Netherite
or
Upload Leggings texture file
Loading texture choices…
Tint Leggings
Trim Leggings
Boots
None
Leather
Chainmail
Gold
Copper
Iron
Diamond
Netherite
or
Upload Boots texture file
Loading texture choices…
Tint Boots
Trim Boots
Enchanted Glint
None
1.20+
Pre-1.20
or
Upload Enchanted Glint texture file
Loading texture choices…
Glint Opacity
Glint X Offset
Glint Y Offset
Loading...
Updates
Jan 2026 NinjolasNJM - Initial script.
May 2026 NinjolasNJM - Changed to use new glint and tint input.
Jul 2026 lostminer - Layout refresh.
©
2026 Pixel Papercraft
Moderation Policy
·
Privacy Policy